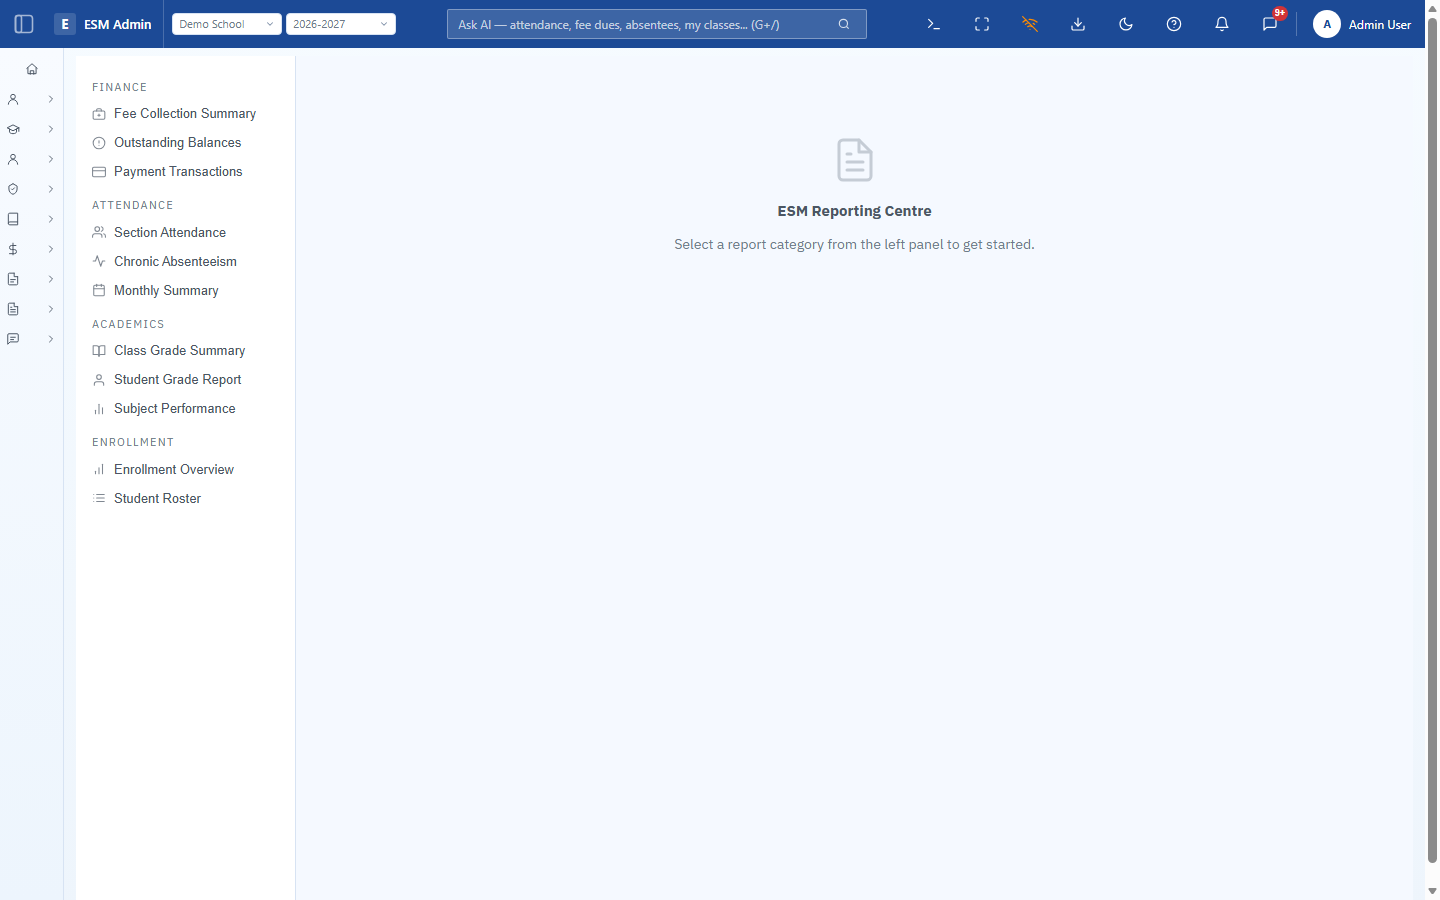
Log in for the first time
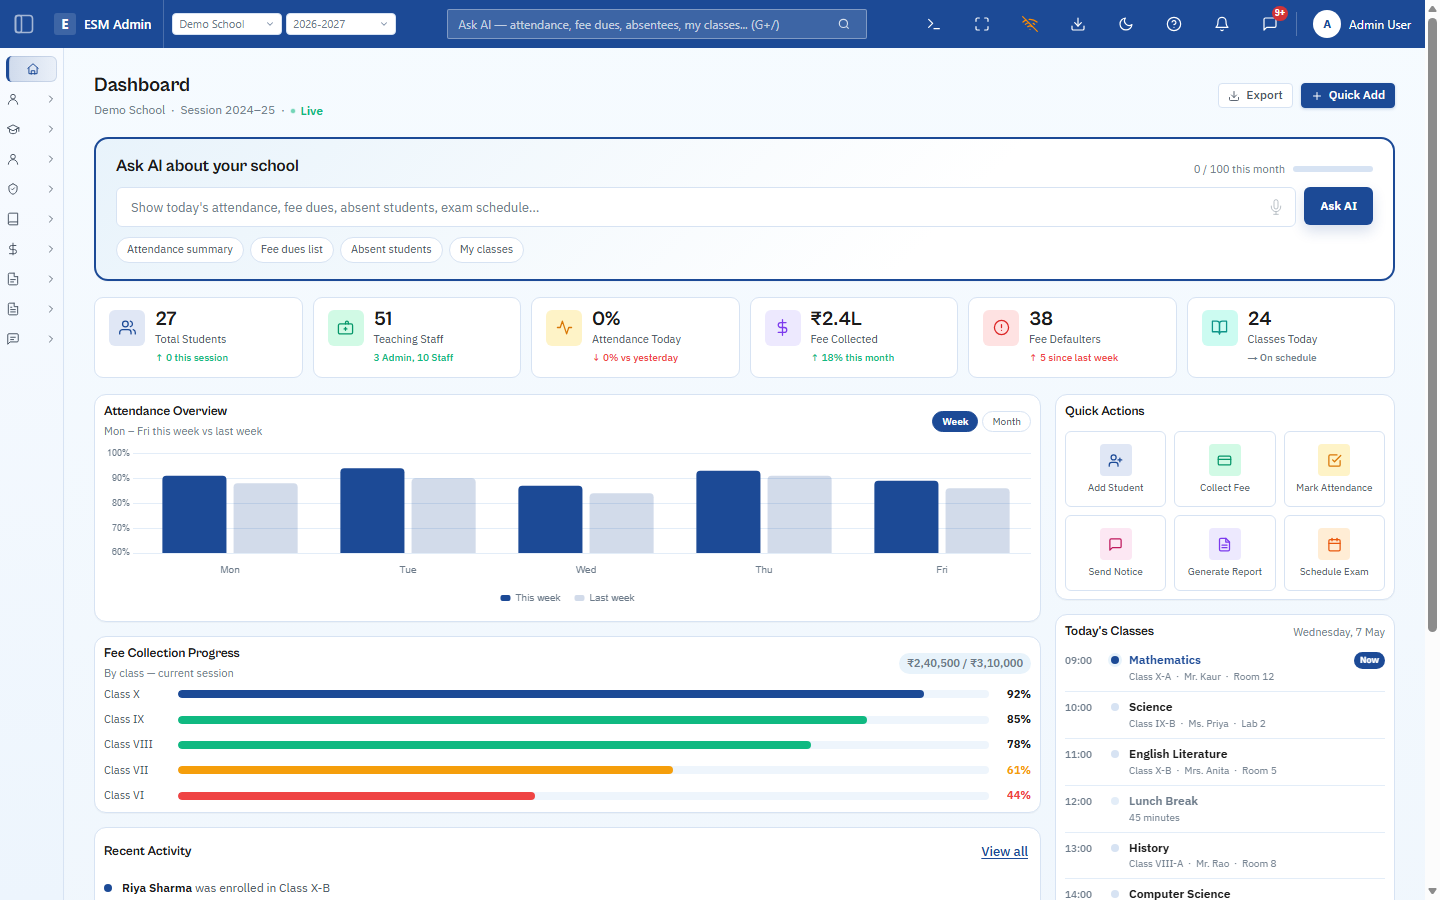
Your welcome email has your admin username, password, and instance URL. Log in and you land on the Dashboard — it will look mostly empty until you complete the steps below.
- The school & session switcher (top-left) matters more once you run multiple branches or years
- "Ask AI" bar answers questions about your data the moment there is data to ask about
- Quick Actions tiles are shortcuts to the same setup screens covered in this guide
Tell ESM about your school
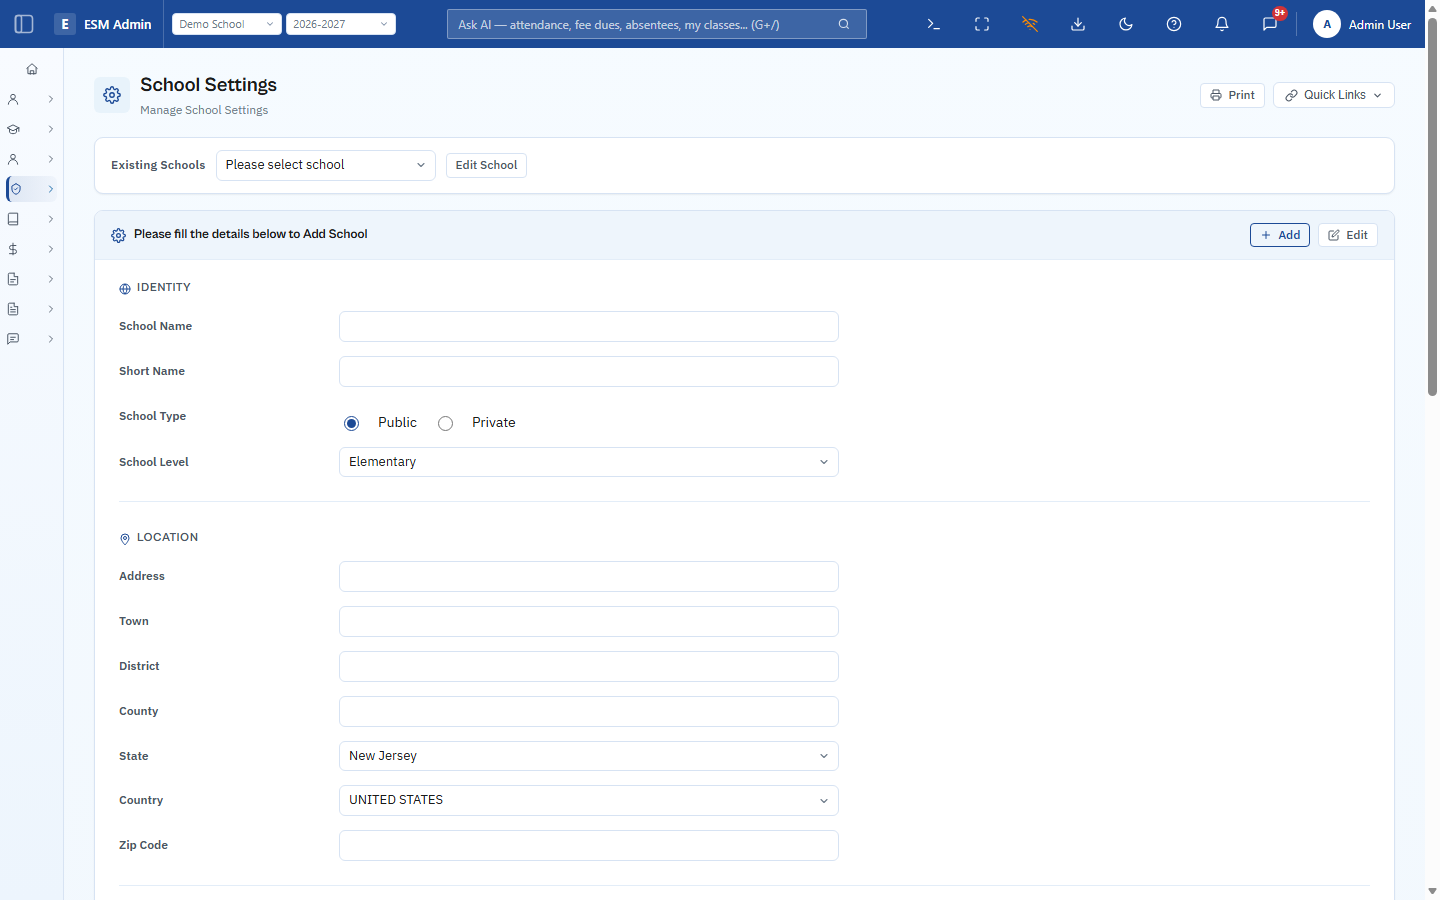
School Settings is the first real stop. Enter your school's identity and location — this data appears on every report, receipt and notice ESM generates from here on.
- School Name & Short Name are used across printed reports and fee receipts
- School Type & Level control which grade structures are available later
- Address, Town, State, Country feed official documents and report headers
Open your first academic session
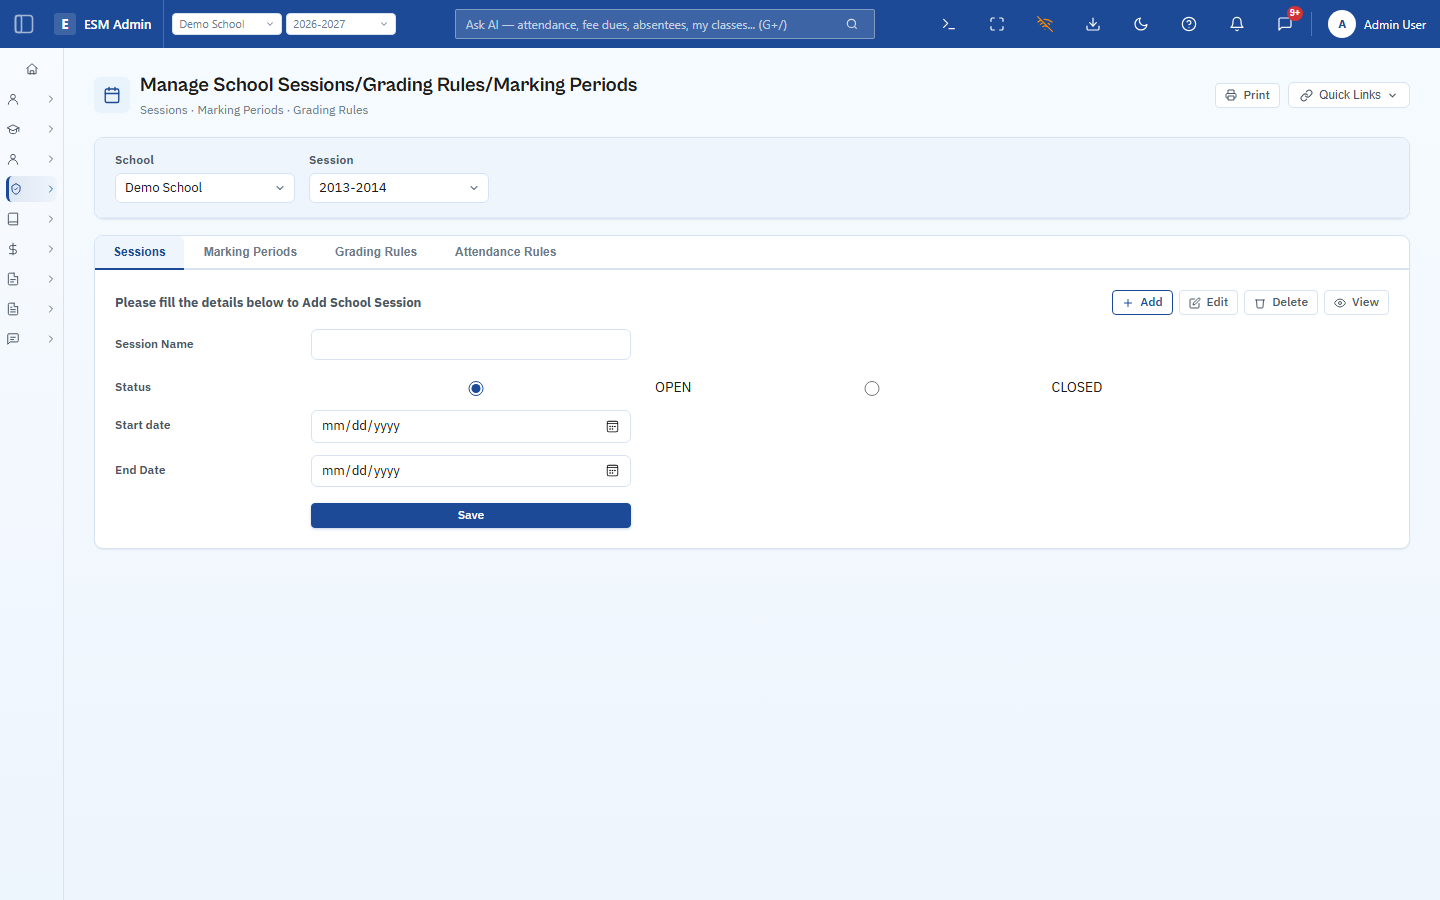
Every school year in ESM is a "Session" — attendance, fees and enrollment are all scoped to one. Add your current session with a start and end date before touching anything else.
- Give it a clear name, e.g. "2026-2027", and mark its status OPEN
- Marking Periods and Grading Rules tabs configure terms and grade scales for the session
- Attendance Rules here decide how absences are counted school-wide
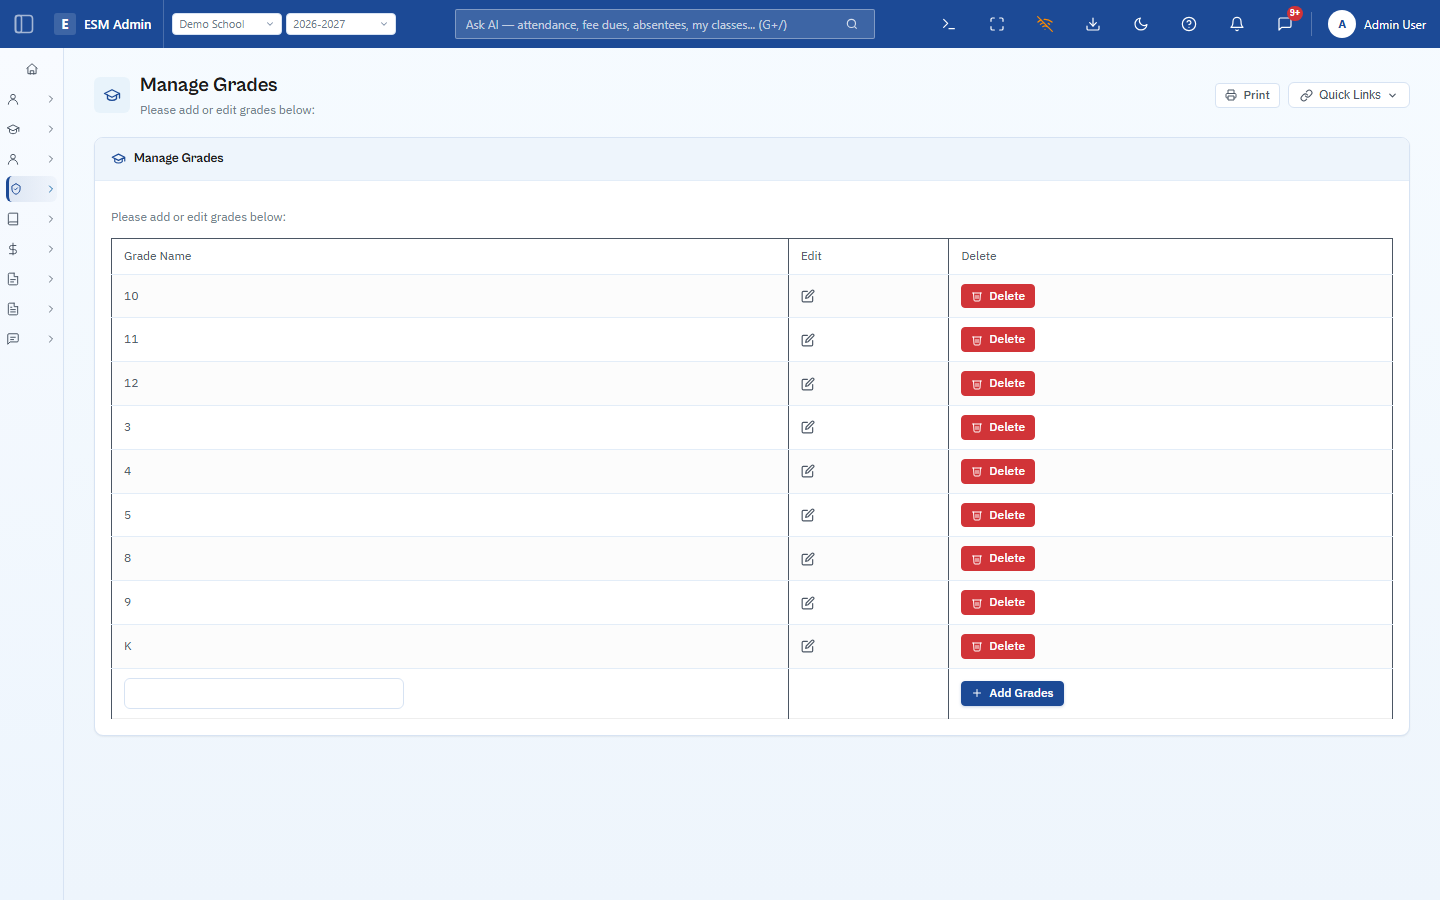
Add your grades
Define every grade level your school teaches. Each one is a single row — add, rename or remove them at any time as your school changes.
- A demo school already has K and grades 3–5, 8–12 — add or remove to match yours
- Grades created here immediately become selectable everywhere else in ESM
- Edit and delete actions stay available even after students are enrolled
Split grades into sections
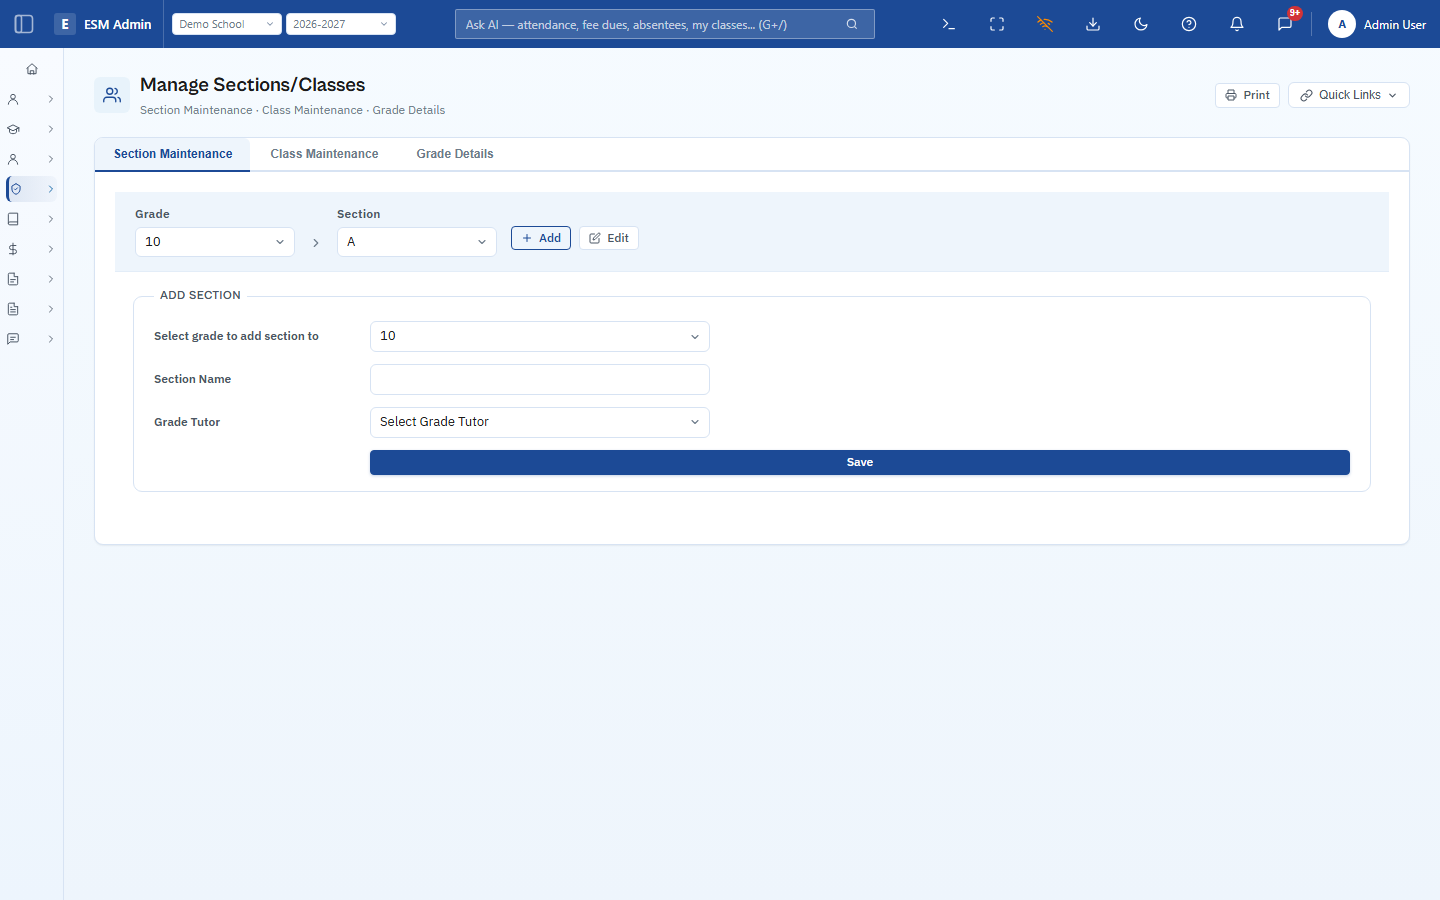
Most grades need more than one class — Section Maintenance splits a grade (say, Grade 10) into sections like A, B and C, each with its own tutor.
- Pick the grade, name the section, and optionally assign a Grade Tutor
- Class Maintenance and Grade Details tabs cover subject and grade-wide configuration
- Sections created here are the exact list students get enrolled into next
Create staff & admin logins
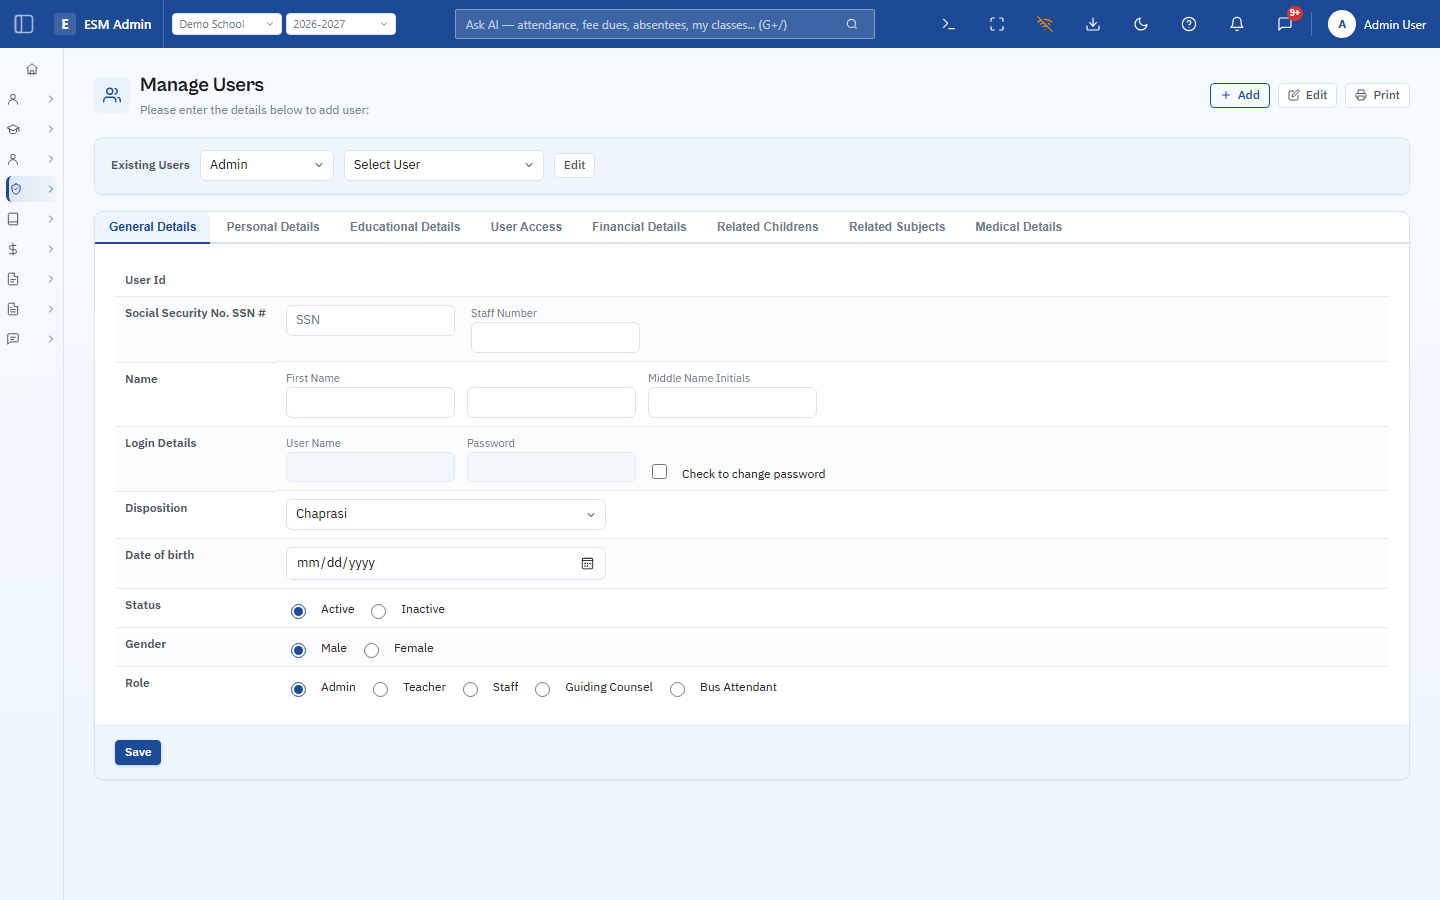
Before students arrive, get your staff into the system — teachers, additional admins, guiding counsel, bus attendants — each with a role that controls what they can see.
- Role radio buttons (Admin / Teacher / Staff / Guiding Counsel / Bus Attendant) set portal access
- Seven detail tabs cover personal, educational, financial and access information per user
- Username and password are set here — share them securely with each staff member
Enroll your first students
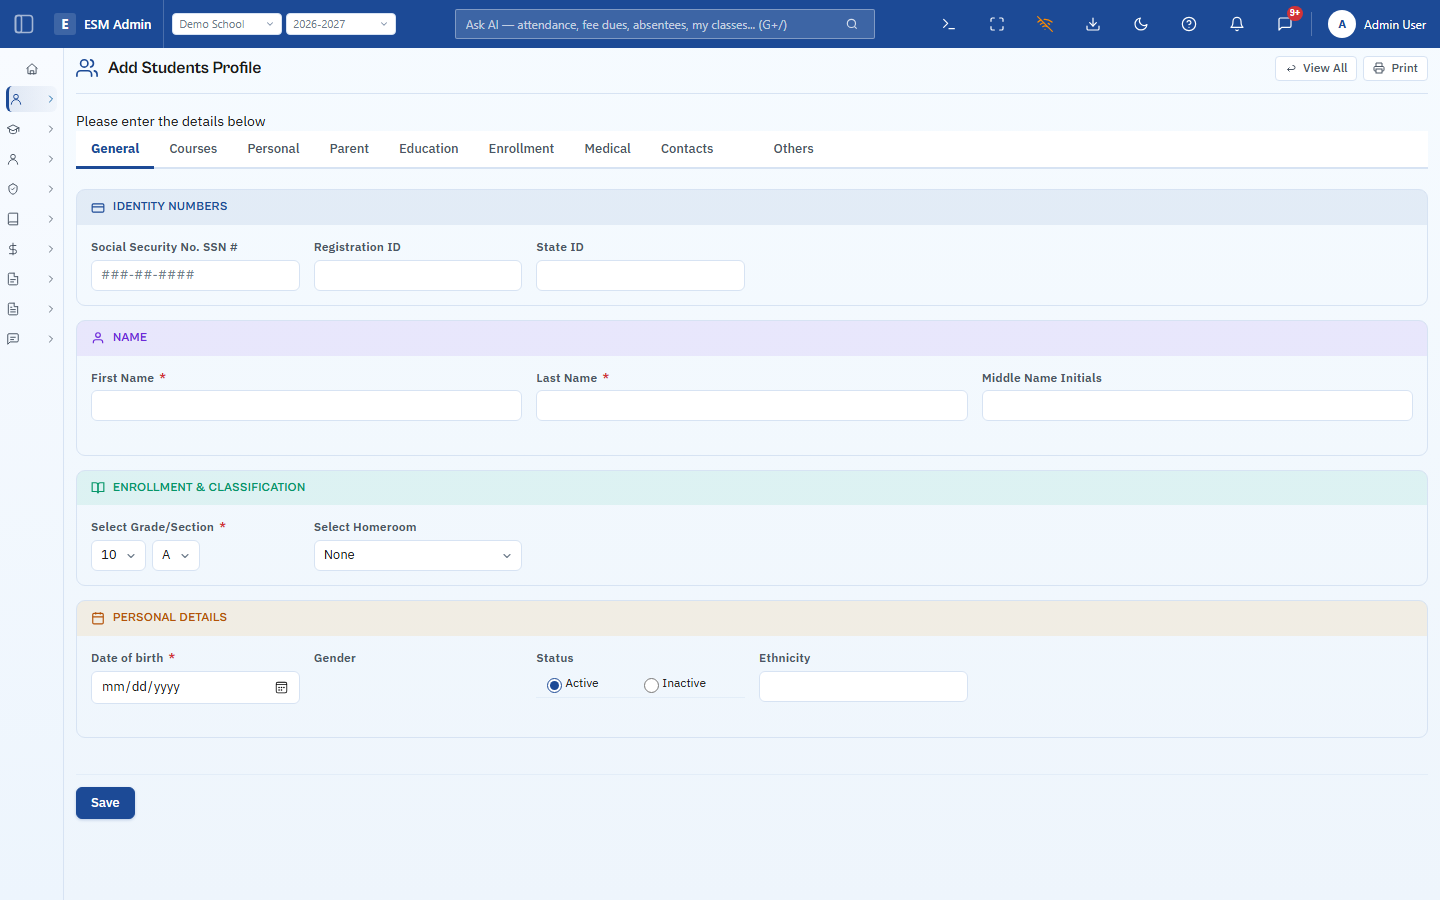
With grades and sections in place, add students one at a time — or ask us about a bulk CSV import if you're migrating existing records.
- Select Grade/Section links each student directly into the structure you built in steps 4–5
- General, Parent, Medical, Enrollment and other tabs build a full academic record per student
- Required fields (marked *) are the minimum ESM needs to place a student correctly
Give every enquiry a home
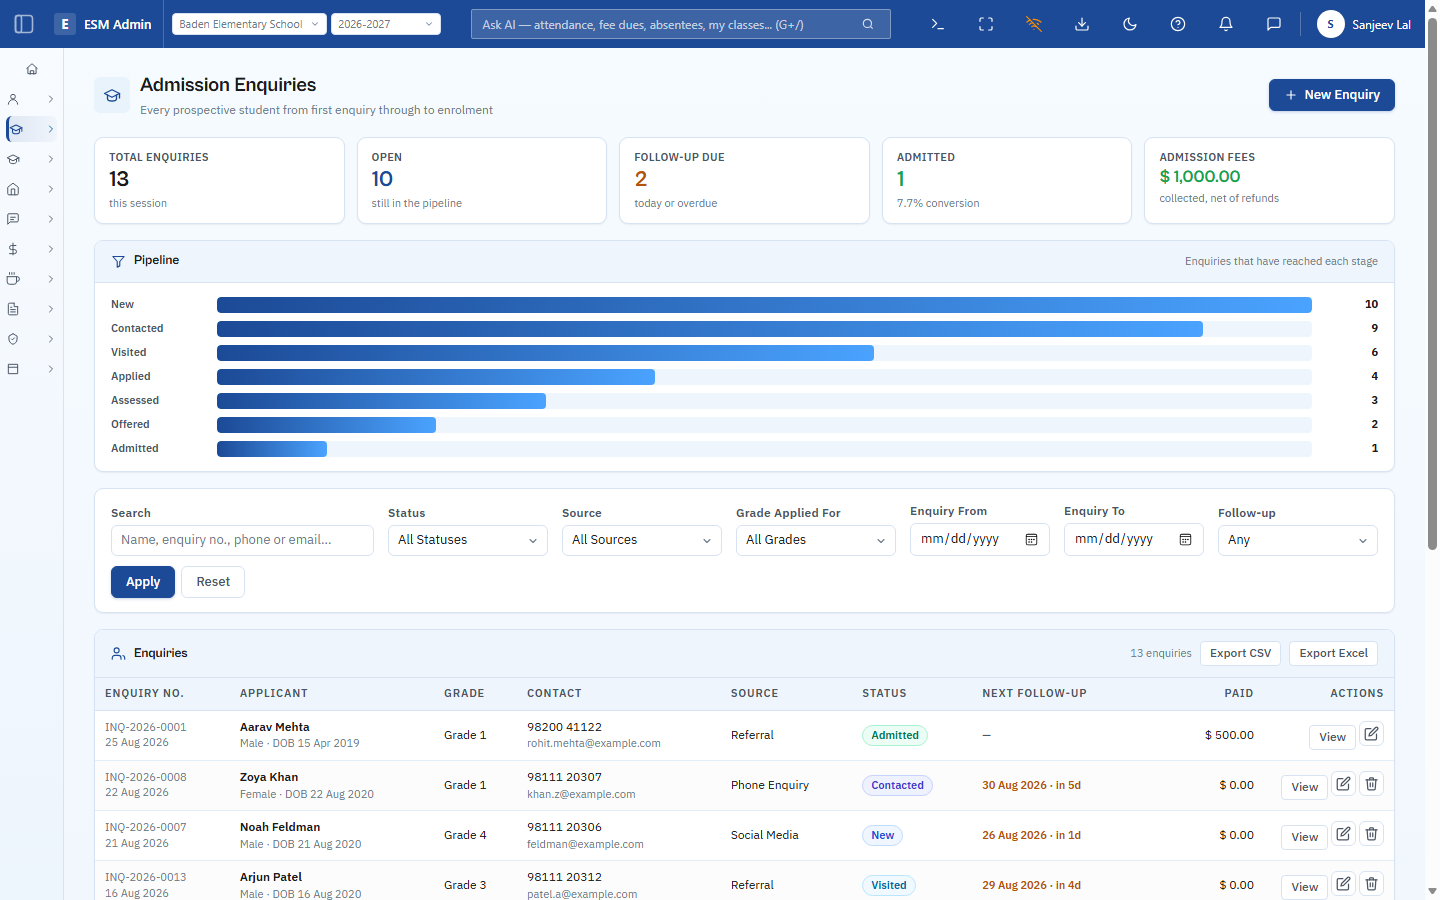
Most students don't just appear — they start as a phone call. Admissions gives that conversation a home, and shows you exactly where every enquiry sits in the pipeline from first contact to admitted.
- Four fields start an enquiry — name, date, grade and a phone number — so nobody waits while you fill in a form
- The pipeline bar shows how many enquiries have reached each stage, from New through to Admitted
- Filter by status, source, grade or follow-up due date to find exactly who needs attention today
Follow up, collect fees, convert
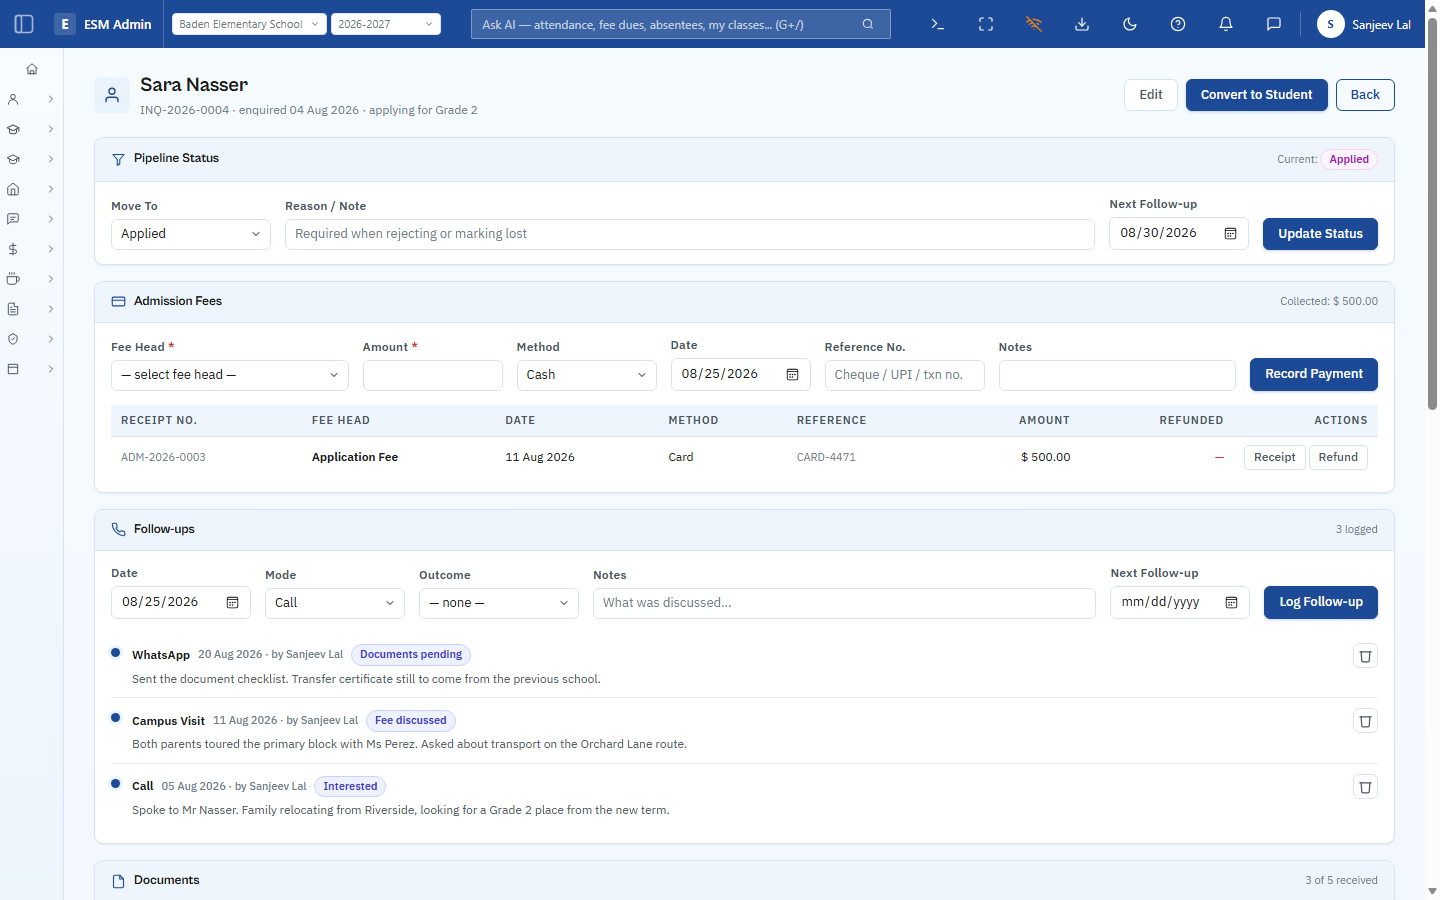
Open any enquiry and everything about that one family lives on a single screen — call log, documents, the application fee, and the decision that turns them into a student.
- Log each follow-up call or visit with an outcome and the next follow-up date
- Record admission fee payments against the enquiry as they come in
- "Convert to Student" carries the enquiry's paid fees across and puts them straight on the roster
Know what's actually working
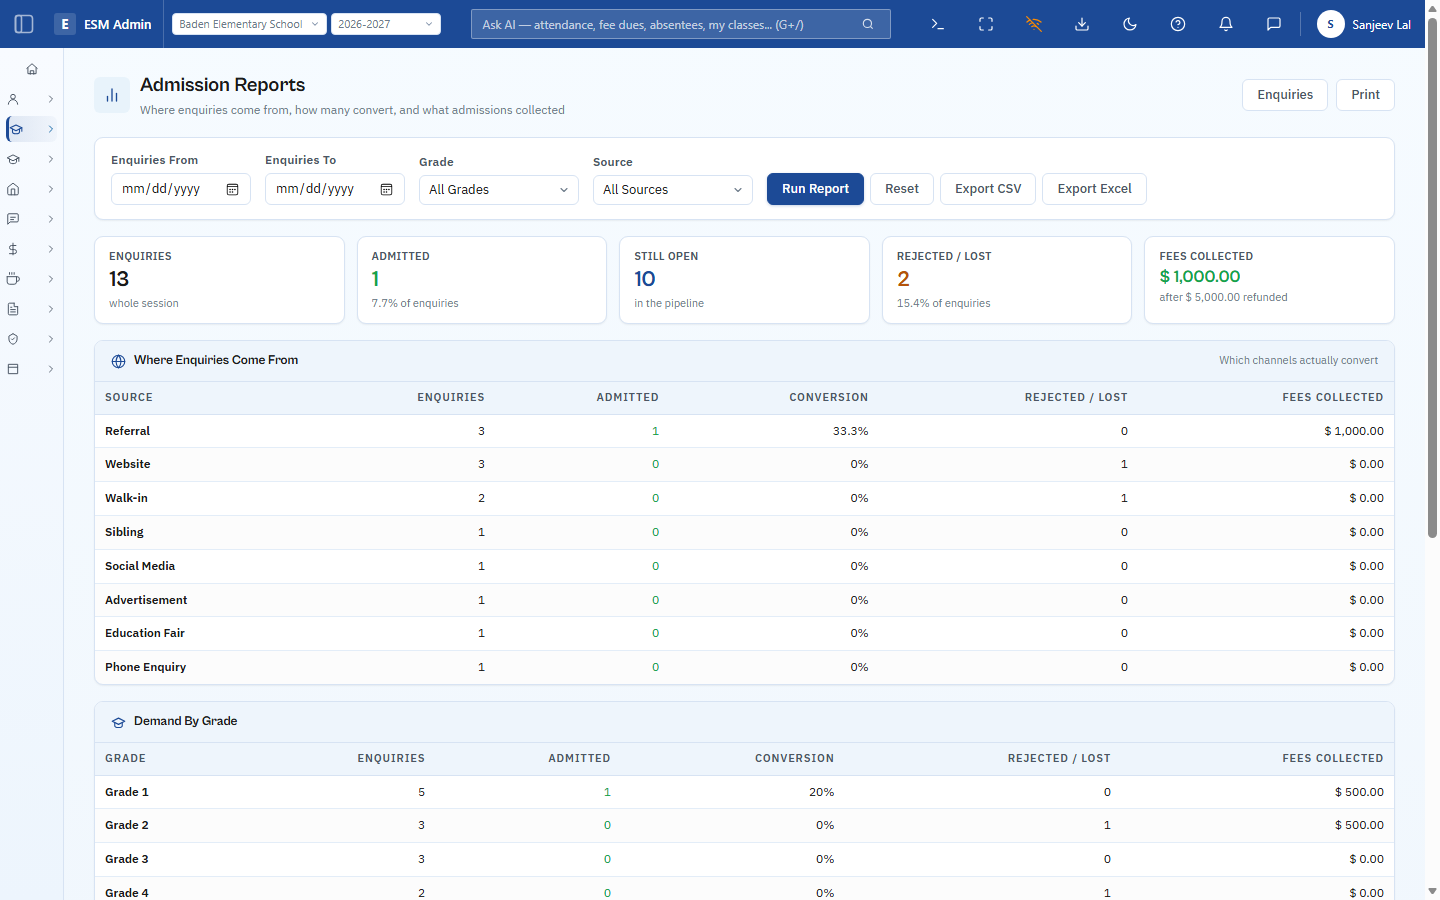
Admission Reports breaks the same pipeline down by source and by grade, so you know which channels are converting and which are just noise.
- Conversion rate and fees collected, broken down by referral, website, walk-in, social media and more
- Demand by grade shows you which year groups are filling up fastest
- Export any filtered view to CSV or Excel for your own email or SMS campaigns
Define what you actually charge
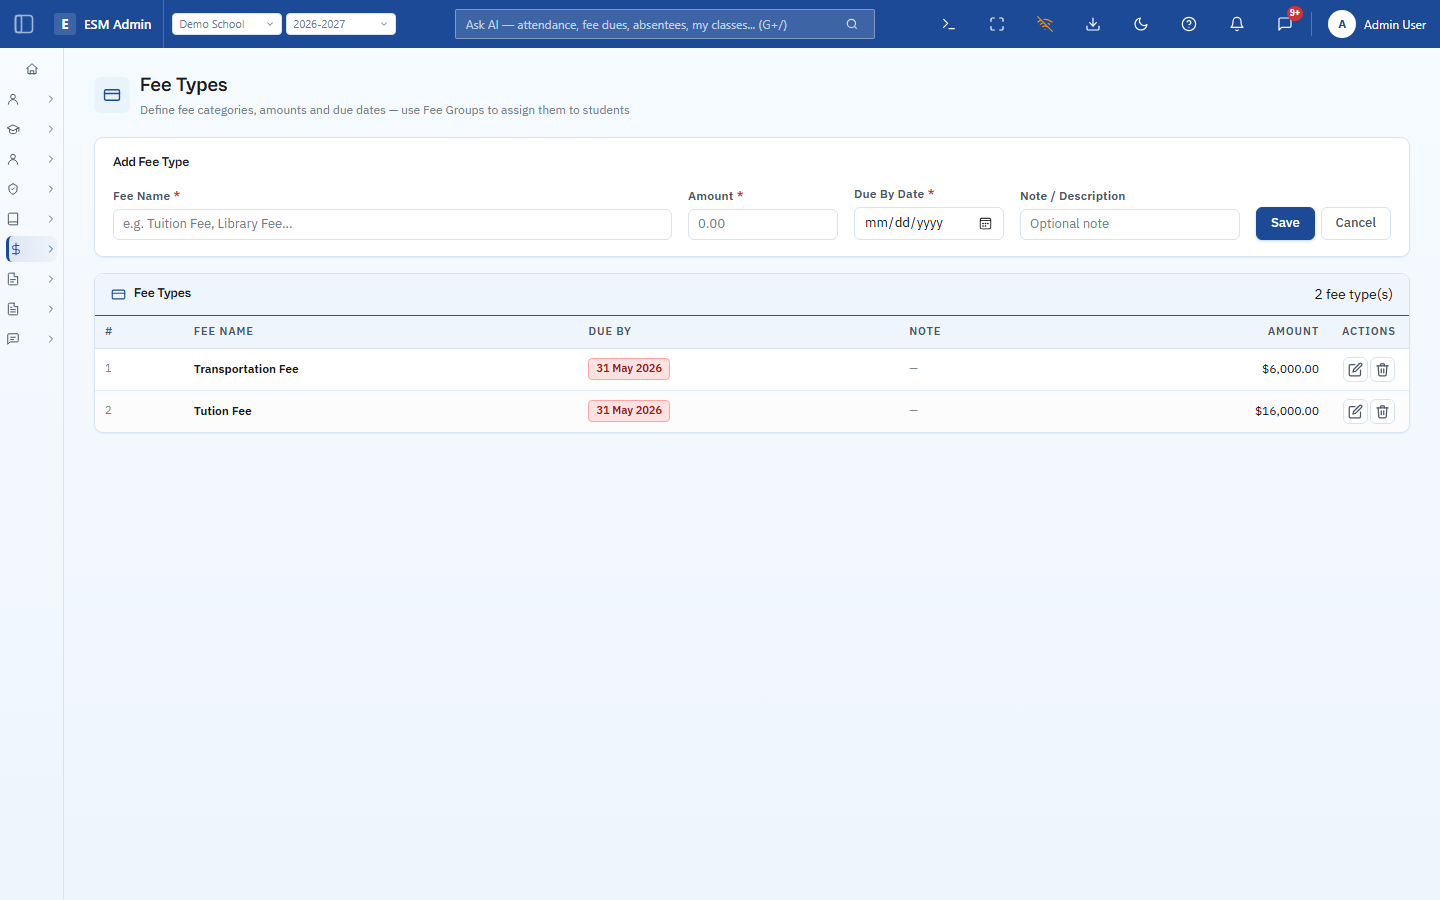
Fee Types are the building blocks of billing — tuition, transport, library, whatever your school charges for — each with an amount and a due date.
- Add as many fee types as you need; each gets its own due-by date and optional note
- Due-by dates drive the overdue tracking you'll see later in Reports
- Edit or delete a fee type at any point before or after it's assigned
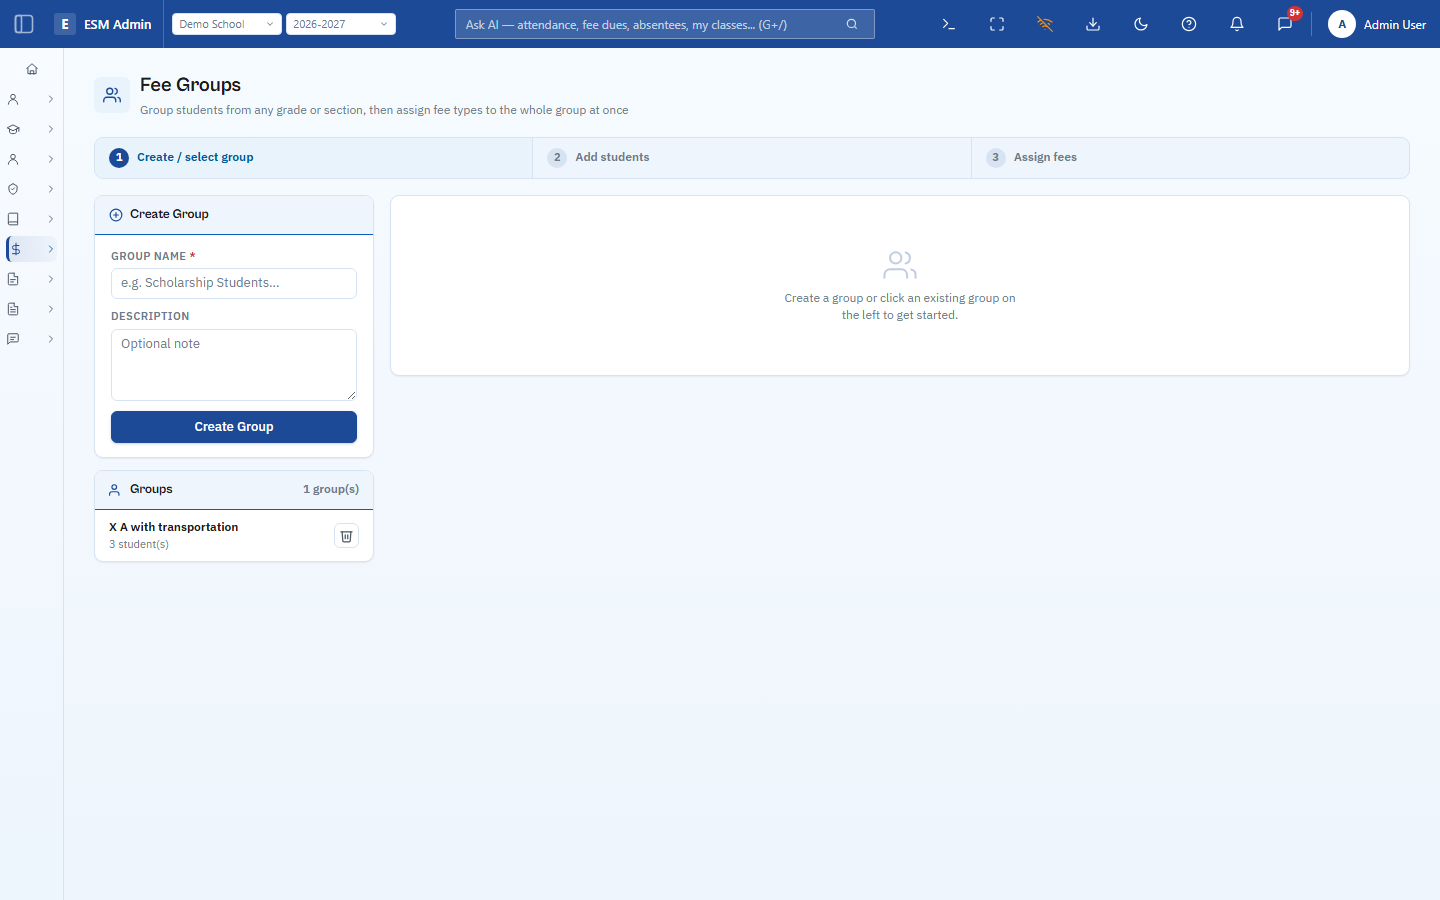
Batch-assign fees with Fee Groups
Rather than billing students one by one, Fee Groups let you gather students from any grade or section and assign a fee type to the whole group in three steps.
- Step 1: create or select a group and give it a description
- Step 2: add students to it from any grade or section
- Step 3: assign one or more fee types to everyone in the group at once
Publish your first notice
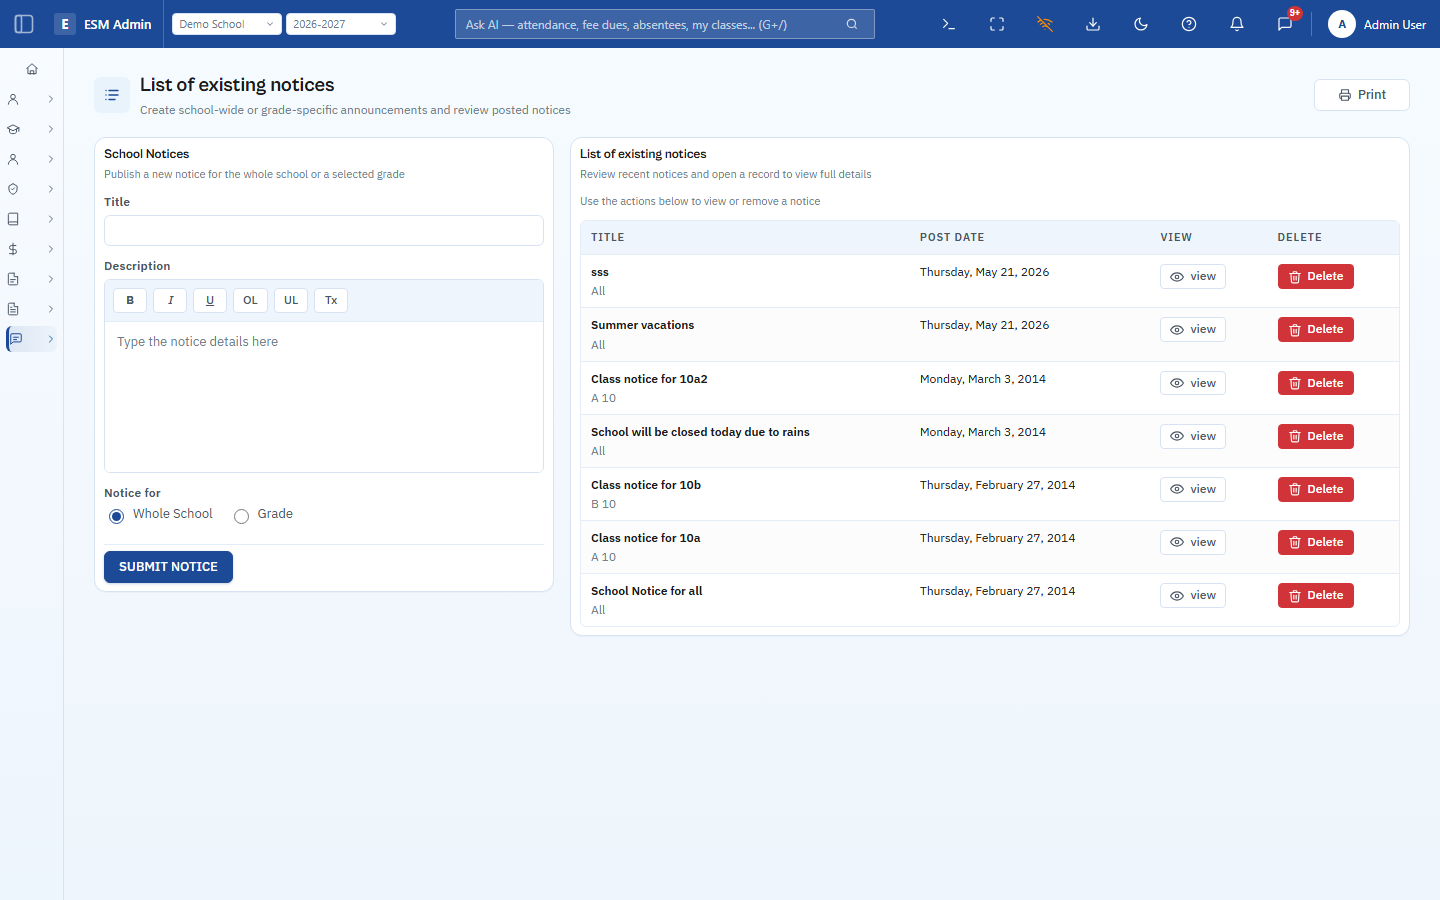
Setup is far enough along to talk to people. Post the new term's start date, a holiday, or a policy update — school-wide or scoped to a single grade.
- The composer supports school-wide or grade-specific targeting
- Every notice stays in a searchable archive alongside the ones you post later
- Staff and parent portals surface the same notices automatically
Everything you set up feeds Reports
Once school settings, sessions, grades, sections, staff, students and fees are in place, the Reporting Centre is where you'll actually live day to day.
- Finance, attendance, academics and enrollment reports all pull from what you just configured
- Everything is printable and exportable for governing boards and inspections
- Setup is done — from here it's daily operation, not configuration